An ESP32-S3 investigation, updated with live Android decoding and physical tests on 17 October 2026. An ESP32-S3 can expose real radio samples. The question is how far that capability carries toward useful applications. Conceptual illustration. I wanted to turn an ESP32 into something more ambitious than another Wi-Fi gadget: a small radio instrument that could capture a remote-control transmission, send the recording to a phone, decode it and eventually reproduce it. The starting point was the ESPARGOS esp-sdr project , which exposes raw radio samples from hardware already inside supported ESP32 chips. That is an exciting capability. It also raises an easy-to-misunderstand question: if software can ask the chip to tune to a frequency, can the chip actually receive useful information there? We tested that question through firmware changes, controlled radio transmissions, independent receivers and a Flutter phone app. We tried GPS, broadcast FM, 433 MHz remote-control signals, n...
Get link
Facebook
X
Pinterest
Email
Other Apps
Shooting awesome timelapse using raspberry pi
Get link
Facebook
X
Pinterest
Email
Other Apps
-
Hi folks,
So if you have a raspberry pi and a camera module one of the cool things that you can do is to make a rig that does time-lapse videos. So i just did that, believe me its awesome.
Now you all know from my previous posts that i do have a 3d printer, so i printed a neat little case for my raspberry pi and a sweet little camera mount. And i bought a custom camera module for raspberry pi from uctronics.com, they have a detachable lens and its kinda good quality and cheap too. Thanks uctronics :)
By the way, you can get the STL files for the Pi case and uctronics camera modules from the below links. Have fun print them :)
Now i installed a thumb-drive because i wanted pi to capture time-lapse on it, you know easy plug and play :) But you Linux on the pi detects the thumb-drive easily and assigns it a wired name. So i get the name
/media/C0D2-6E8C/
Which i hated when working with ssh or command prompt. So lets fix it first. There is a simple Linux command to define an alias for this location, be careful you may be having a different name for your thumb-drive find it out and use that. DO NOT USE THE SAME PATH AS MINE, FIND YOURS AND USE IT :-)
First we will make a folder so that it will be used as an alias for the mount location of the thumb-drive
Now that we have the folder ready to act as the alias for the thumb-drive lets make an entry in the file systems table file, which is normally on the location "/etc/fstab"
Lets edit the file
sudo nano /etc/fstab
Now add the following line onto the end of file. REMEMBER THIS MOUNT LOCATION IS FOR MY THUMBDRIVE, YOUR'S MAY VARY SO FIND AND CONFIRM THIS
Change the UUID as per your mount location. Once this is done reboot the pi
Voila we have the thumb-drive mounted on "/media/tusb" when the pi restarts. We can do whatever recording you need on the location.
Now we have done that, lets think about capturing stuff through pi camera module. There are so many awesome tutorials in the internet to setup camera module for pi and do lot of stuff, so i am not going to get into details of setting those up, and yeah plugging in camera too. check YouTube videos for that and learn.
Now assuming that you have some basic understanding of setting up the camera module and taking first picture. I am going to proceed further. My plan is to have the put the pi on my bedroom window starting at night and record through the night to morning so i can have some visuals of sunrise.
There's a catch!!!!! Capturing pics at night and day means that you need some logic to adjust the exposure timing so that the results will be neat. If you use day exposure values throughout you will only get blank pics from night. So I wanted some logic to automate that for me.
I searched a lot and found a python script to do that job. A guy named craig did it as part of his project here. His code was available in github and i downloaded it. It was not working as i expected and i did modify it to fine tune for my requirement with some trial and error. Don't worry i have uploaded it on github too, here https://github.com/moheshmohan/rpidaynightcam
Now before the script can be ran on pi, you will need to install prerequisites softwares. Here are the commands to do that
here you can see the main script rpidaynightcam.py and here is the command line help for it
Command Line Help
There are several options available for the program. Running the script with the -h option will display a helpful description of the options:
python rpidaynightcam.py -h
Taking Pictures
To take pictures of various objects, you can specify the number of pictures to take as well as a time delay between successive pictures. For example, to take 10 pictures:
sudo python rpidaynightcam.py -n 10
To take 10 pictures with a delay of 5 seconds between each:
sudo python rpidaynightcam.py -n 10 -d 5
Saving files to a different path:
sudo python rpidaynightcam.py -p /path/to/save/to
Set night time conditions:
sudo python rpidaynightcam.py -g
Take pictures until interrupted:
sudo python rpidaynightcam.py -n 0
Adjusting for light conditions
You can instruct the camera module to attempt to adjust for light conditions by specifying the --autoswitch:
sudo python rpidaynightcam.py --auto -n 0
This will continue taking pictures until the program is interrupted. In order to switch between day and night mode, you can specify at what light level you want to make the swap on. For example, if the camera is in night mode, then increasing light levels will make the picture brighter and brighter until the entire image is white. To swap to day mode, the camera calculates the R, G, and B average intensities, and compares it to the --day value. If the intensities are greater than the --day value, it will attempt to turn the camera on to day mode. The opposite occurs for --night values.
Both --day and --night are values in the range of 0 - 255. For example, to get the camera to switch to day mode when the average pixel intensity reaches 240, and switch to night mode when the average pixel intensity reaches 30:
Now i have not changed much on craig's script with arguments. Lets try to run the script so that even if the shell is closed the script will run until shutting down pi
Here are some videos i captured with this setup (i played around with exposure values in some :) ) And oh yeah watch for the bloom effect when sun rises, the script automatically adjusts the exposure time based on ambient light :-)
Hope you like them. Please do comment, subscribe to my youtube, click some ads :D , share this page to support me. Thanks folks
Raspberry Pi timelapse projects are satisfying because you have complete control over every aspect, including lighting and intervals. I enjoy how inventiveness is made possible by basic scripting. In reality, London Proofreading Helpers frequently remind me that when recording setups, clarity is crucial. Your advice encourages patience and makes experimentation accessible while skillfully capturing shifting skies.
I really enjoyed reading this and learning how a Raspberry Pi, camera module, and a bit of Python can be combined to create such a creative time-lapse setup. The way you explained the automatic adjustment for day and night conditions makes the project especially interesting and practical. Thank you for sharing your experience, detailed instructions, and useful tips. It’s inspiring to see how simple hardware and some creativity can turn into such an impressive project! https://www.insulationvictoria.com/
Hi Security enthusiast, So if you were following closely on recent developments regarding SSL/TLS security, you might have heard that Qualys SSL labs released an API to automate the testing of internet hosted applications with their awesome hosted testing solution. If you have not heard about it here is the location to their server testing page - https://www.ssllabs.com/ssltest/ And their API documentation here - https://github.com/ssllabs/ssllabs-scan/blob/master/ssllabs-api-docs.md So now that the API is released you can automate testing of any number of servers with any language that is able to talk with qualys server via HTTP protocol. My company wanted to test all of our servers with SSL labs, so i thought why can't i automate it with python or something. So here it is, i made a multithreaded python script to test a large number of servers in one go and get results in neat format that my management wanted :-) The script is intended for python 2.7 Yo...
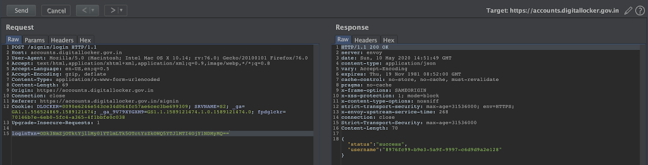
Hi Guys, This is a repost of the blog that was written on https://yetanothersec.com/blog/2020/06/03/digilocker-disclosure/ as the yas portal is facing technical issues everynow and then. Also apologies for the bad quality of screen shots, i will find old files and update it later. D uring the beginning of May 2020, there was a large commotion about the arogyasetu app and its security after a so called “hack” by infamous political hacker named Elliot Alderson. In light of all this, we at the YAS (Yet Another Security) community, had some talks in our WhatsApp group. So, it turned out to be a discussion on techniques used for bypassing SSL pinning on the mobile apps. This whole discussion made be curious about other apps from India government and since I have worked on similar projects outside of India, digilocker caught my attention. Hence, I downloaded the app and installed on my test devices and fired up my favorite toolset burpsuite + Frida. I used my homebrewed pinn...
Hi Folks, So if you are playing around with kali linux on a VM you might have faced the issue of getting the vmware tools work properly. Especially when you want to copy paste files and clipboard contents between guest and host. This is very annoying thing and took lot of my precious time when i was doing OSCP course. Here is how i fixed it. My Setup I run a kali linux distro on vmware player which is recommended for doing the OSCP course. By default it has GNOME as the default GUI. I kind of hate it as it uses lot of resources and has all those stupid animations and stuff. I want something clean and precise when i am working, i am not into looks and too many features, just the bare minimum responsive system is always my favourite. So I installed LXDE which is light weight GUI for linux. you can install it with following command apt-get install lxde-core lxde kali-defaults kali-root-login desktop-base This will not make LXDE you default GUI, so if you reboot, you will n...


Raspberry Pi timelapse projects are satisfying because you have complete control over every aspect, including lighting and intervals. I enjoy how inventiveness is made possible by basic scripting. In reality, London Proofreading Helpers frequently remind me that when recording setups, clarity is crucial. Your advice encourages patience and makes experimentation accessible while skillfully capturing shifting skies.
ReplyDeleteI really enjoyed reading this and learning how a Raspberry Pi, camera module, and a bit of Python can be combined to create such a creative time-lapse setup. The way you explained the automatic adjustment for day and night conditions makes the project especially interesting and practical. Thank you for sharing your experience, detailed instructions, and useful tips. It’s inspiring to see how simple hardware and some creativity can turn into such an impressive project! https://www.insulationvictoria.com/
ReplyDelete